Introduction
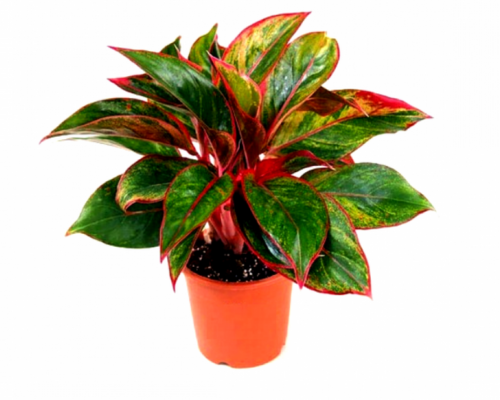
Indoor gardening has become a popular trend in recent years, and one plant that stands out for its beauty and low maintenance requirements is the Aglaonema, commonly known as the Chinese Evergreen. Growing Aglaonema from seeds can be a rewarding experience, allowing you to witness the entire lifecycle of this gorgeous plant. In this guide, we’ll walk you through the steps to prepare Aglaonema plant seedlings for your indoor garden.
Materials you’ll need before you begin
Aglaonema seeds
Seed-starting mix or a well-draining potting mix
Seedling trays or small pots with drainage holes
Clear plastic wrap or a humidity dome
A spray bottle for misting
Grow lights or a bright, indirect light source
A warm, draft-free location
Watering can with a fine nozzle
Step 1: Choose Quality Aglaonema Seeds
Selecting high-quality seeds is crucial for successful seedling preparation. Look for reputable seed suppliers or consider collecting seeds from a mature Aglaonema plant if you have one.
Step 2: Prepare the Seed-Starting Mix
Aglaonema seeds need a well-draining and nutrient-rich medium to germinate successfully. You can create a suitable mix by combining equal parts of peat moss, perlite, and vermiculite. Alternatively, you can use a commercially available seed-starting mix.
Step 3: Sow the Aglaonema Seeds
Fill your seedling trays or small pots with the prepared mix, leaving a little space at the top. Sprinkle the Aglaonema seeds evenly on the surface of the mix. Do not bury the seeds, they require light to germinate.
Step 4: Cover and Mist
Gently press the seeds into the mix, ensuring good seed-to-soil contact. Cover the trays or pots with clear plastic wrap or a humidity dome to create a mini-greenhouse effect. This helps retain moisture and maintains a stable environment for germination. Mist the surface lightly with water to keep the mix moist.
Step 5: Provide Adequate Light and Temperature
Place your seed trays or pots in a warm, well-lit location. Aglaonema seeds need temperatures around 70-75°F (21-24°C) for optimal germination. If natural light is insufficient, consider using grow lights to provide adequate brightness. Ensure the seeds receive indirect light, as direct sunlight can scorch them.
Step 6: Maintain Moisture
Monitor the moisture level in the seed trays or pots closely. Mist the surface with a spray bottle as needed to keep it consistently moist but not soggy. Avoid overwatering, as this can lead to fungal issues.
Step 7: Wait for Germination
Be patient, as Aglaonema seeds can take several weeks to germinate. Once the seedlings have emerged and grown a few inches tall, you can remove the plastic wrap or humidity dome.
Step 8: Transplant Seedlings
When the seedlings have developed a few true leaves, it’s time to transplant them into individual pots filled with a well-draining potting mix. Carefully lift each seedling from the tray or pot, taking care not to damage the delicate roots. Plant them at the same depth they were growing in the seed tray.
Step 9: Provide Ongoing Care
Place the potted seedlings in a bright, indirect light spot, and continue to water them when the top inch of soil feels dry. Maintain a consistent temperature and humidity level to encourage healthy growth.
Conclusion
Growing Aglaonema plant seedlings from seeds can be a gratifying experience for indoor gardeners. With patience, proper care, and the right materials, you can enjoy the beauty of these stunning plants in your home. Remember to adapt your care routine as your Aglaonema seedlings mature, and soon you’ll have thriving, vibrant additions to your indoor garden. Happy gardening!
for more info call us at : 7376841090
Visit us: www.maximumplants.com

